The Ultimate Death Card Machine (カードデスマシーン) is a card dispensing minigame featured in Danganronpa V3: Killing Harmony. The machine is part of Danganronpa V3's bonus modes, unlocked after completing the main game. The Ultimate Death Card Machine dispenses collectible cards featuring students from Danganronpa: Trigger Happy Havoc, Danganronpa 2: Goodbye Despair, and Danganronpa V3: Killing Harmony.
About[]
The Ultimate Death Card Machine is unlocked, alongside the board game minigame Ultimate Talent Development Plan (超高校級の才能育成計画 lit. Super High School Level Development Plan) and the dungeon crawler minigame Despair Dungeon: Monokuma's Test (絶望のダンジョン モノクマの試練 lit Dungeon of Despair: Monokuma's Trial), as a set of bonus modes unlocked after the main game is completed. All three minigames are linked by the cards dispensed by the Ultimate Death Card Machine. The Ultimate Death Card Machine can be found by selecting "Draw Death Cards" from the menus of Ultimate Talent Development Plan or Despair Dungeon: Monokuma's Test.
Machine Mechanics[]

The Ultimate Death Card machine dispenses cards featuring students from Danganronpa: Trigger Happy Havoc, Danganronpa 2: Goodbye Despair, and Danganronpa V3: Killing Harmony. In order to use the machine, the player requires "G", the currency received for defeating enemies in Despair Dungeon: Monokuma's Test and unlocking treasure boxes. After collecting a card from the machine, you can then level up that card by playing the board game Ultimate Talent Development Plan. In turn, that boosted character can then be used to challenge the dungeon crawler Despair Dungeon: Monokuma's Test.

There are three rarities of cards for each character: ![]() Rank
Rank ![]() Rank, and
Rank, and ![]() Rank. All three rarities of card can be obtained from the Ultimate Death Card Machine, with S Rank and U Rank cards being harder, and hardest to draw from the machine respectively. However, sometimes the items "S Ticket" and "U Ticket" can be obtained from treasure boxes in the Despair Dungeon: Monokuma's Test dungeon crawler, which will allow you a guaranteed draw of a random S Rank or U Rank card. The stats for rarer cards increase much quicker while playing the Ultimate Talent Development Plan board game, meaning it's much easier to make them very strong cards. The higher a card's stats, the more effective it will be at defeating enemies in the Despair Dungeon: Monokuma's Test dungeon crawler.
Rank. All three rarities of card can be obtained from the Ultimate Death Card Machine, with S Rank and U Rank cards being harder, and hardest to draw from the machine respectively. However, sometimes the items "S Ticket" and "U Ticket" can be obtained from treasure boxes in the Despair Dungeon: Monokuma's Test dungeon crawler, which will allow you a guaranteed draw of a random S Rank or U Rank card. The stats for rarer cards increase much quicker while playing the Ultimate Talent Development Plan board game, meaning it's much easier to make them very strong cards. The higher a card's stats, the more effective it will be at defeating enemies in the Despair Dungeon: Monokuma's Test dungeon crawler.
Danganronpa: Trigger Happy Havoc, Danganronpa 2: Goodbye Despair, and Danganronpa V3: Killing Harmony characters are all in separate Ultimate Death Card Machines, and you can select which machine you wish to spend your currency on. A "complete" machine is one in which all character cards for that particular machine have been collected in all 3 ranks.
Increasing the Ultimate Death Card Machine Rank[]
The Ultimate Death Card Machine's rank will increase each time 10 levels of the Despair Dungeon: Monokuma's Test dungeon crawler are cleared, and the miniboss at the end of each 10 levels is defeated. As the Machine's rank rises, so does the probability of an S or U Rank card being drawn from the machine, but so does the amount of G currency required to use the Machine.
| Rank | G Cost | Rank Up Condition | N Rate | S Rate | U Rate |
|---|---|---|---|---|---|
| 1 | 100 | Default rank | 99.0% | 1.0% | 0.0% |
| 2 | 120 | Defeat Monokumasect on B10F and reach B11F | 97.0% | 3.0% | 0.0% |
| 3 | 150 | Defeat Monokuma Tank on B20F and reach B21F | 93.0% | 7.0% | 0.0% |
| 4 | 200 | Defeat Monokuma Boss on B30F and reach B31F | 85.0% | 14.5% | 0.5% |
| 5 | 280 | Defeat Mon'Duba on B40F and reach B41F | 75.0% | 24.0% | 1.0% |
| 6 | 360 | Defeat Monokoppa on B50F and reach B51F | 62.0% | 33.0% | 5.0% |
| 7 | 450 | Defeat Monokumasect V3 on B60F and reach B61F | 52.0% | 38.0% | 10.0% |
| 8 | 550 | Defeat Monokuma Tank V3 on B70F and reach B71F | 45.0% | 40.0% | 15.0% |
| 9 | 700 | Defeat Monokuma Boss V3 on B80F and reach B81F | 40.0% | 40.0% | 20.0% |
| 10 | 900 | Defeat Mon'Duba V3 on B90F and reach B91F | 33.0% | 33.0% | 34.0% |
Card Mechanics[]
Stat Types[]
Each card has its own set of strengths and weaknesses, which will give various advantages in the dungeon crawler.
| Stat | Effects |
|---|---|
| Influence | HP level. If this reaches 0, it's game over. |
| Focus | MP level. MP is spent to use skills. |
| Strength | Higher attack power. |
| Defense | Reduces the effect of normal enemy attacks. |
| Intellect | Increases the power of skills. |
| Fortitude | Reduces the damage taken from enemy skills. Makes a character more likely to avoid status effects. |
| Agility | Having a high speed stat will make a character go first in combat, making it easier to avoid enemy attacks. |
| Luck | The party member with the highest luck determines the probability of escaping from combat. Luck also effects how often a character will perform critical hits. A character with 999 luck will have critical hits every turn. |
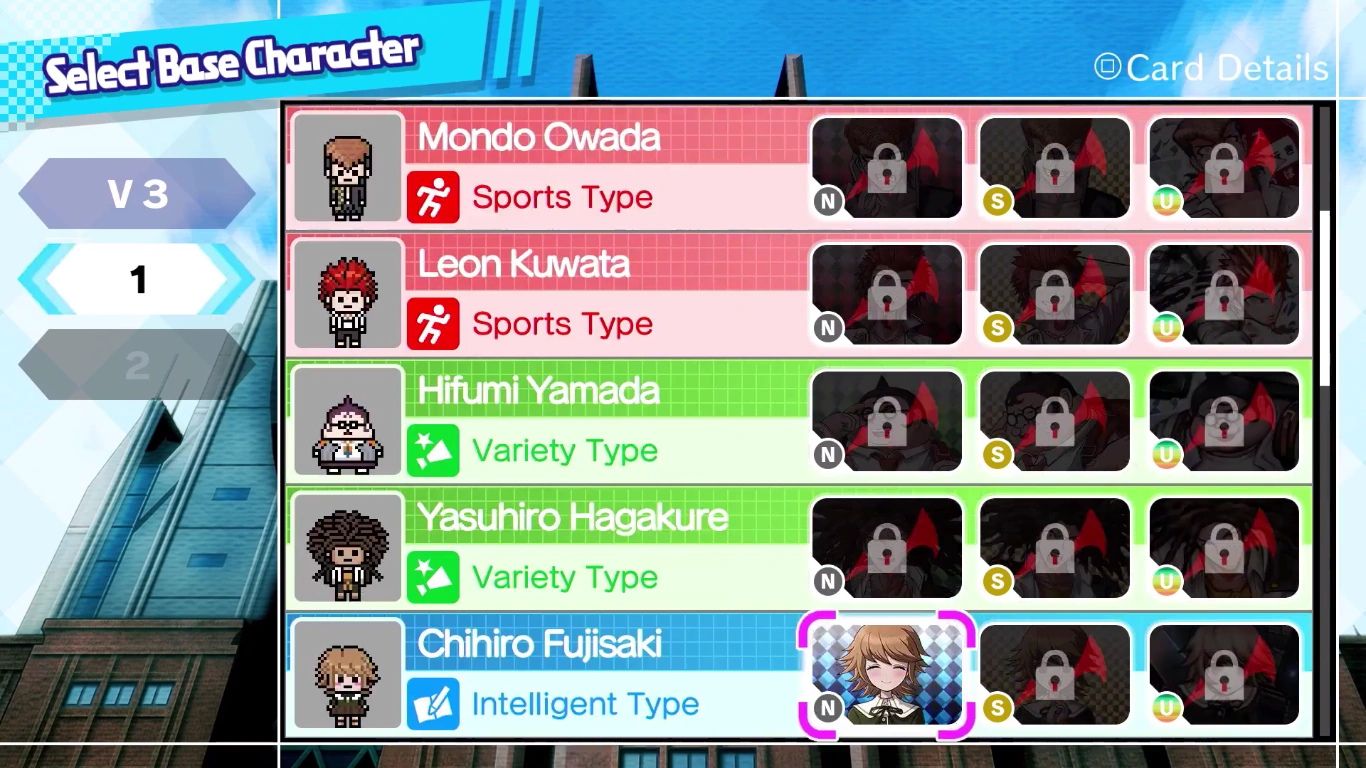
Card Types[]
There are 3 types of card:
![]() Sports Type gain speed and strength at a faster rate and are physical attackers.
Sports Type gain speed and strength at a faster rate and are physical attackers.
![]() Intelligent Type gain focus and intelligence at a faster rate, and have stronger skill attacks.
Intelligent Type gain focus and intelligence at a faster rate, and have stronger skill attacks.
![]() Variety Type have stats which grow in a balanced way.
Variety Type have stats which grow in a balanced way.
All Cards and their Stats[]
- For images of each card, see: Ultimate Death Card Machine/Image Gallery.
| The information below was collected predominantly by Gaidenさん and ああああさん Gamers-High.com |
|---|
Danganronpa: Trigger Happy Havoc Characters[]
| Name | Influence | Focus | Strength | Defense | Intellect | Fortitude | Agility | Luck | |
|---|---|---|---|---|---|---|---|---|---|
| Aoi Asahina | 18 | 15 | 4 | 2 | 1 | 1 | 5 | 3 | |
| Byakuya Togami | 10 | 25 | 1 | 2 | 5 | 3 | 2 | 1 | |
| Celestia Ludenberg | 15 | 20 | 1 | 2 | 4 | 2 | 4 | 3 | |
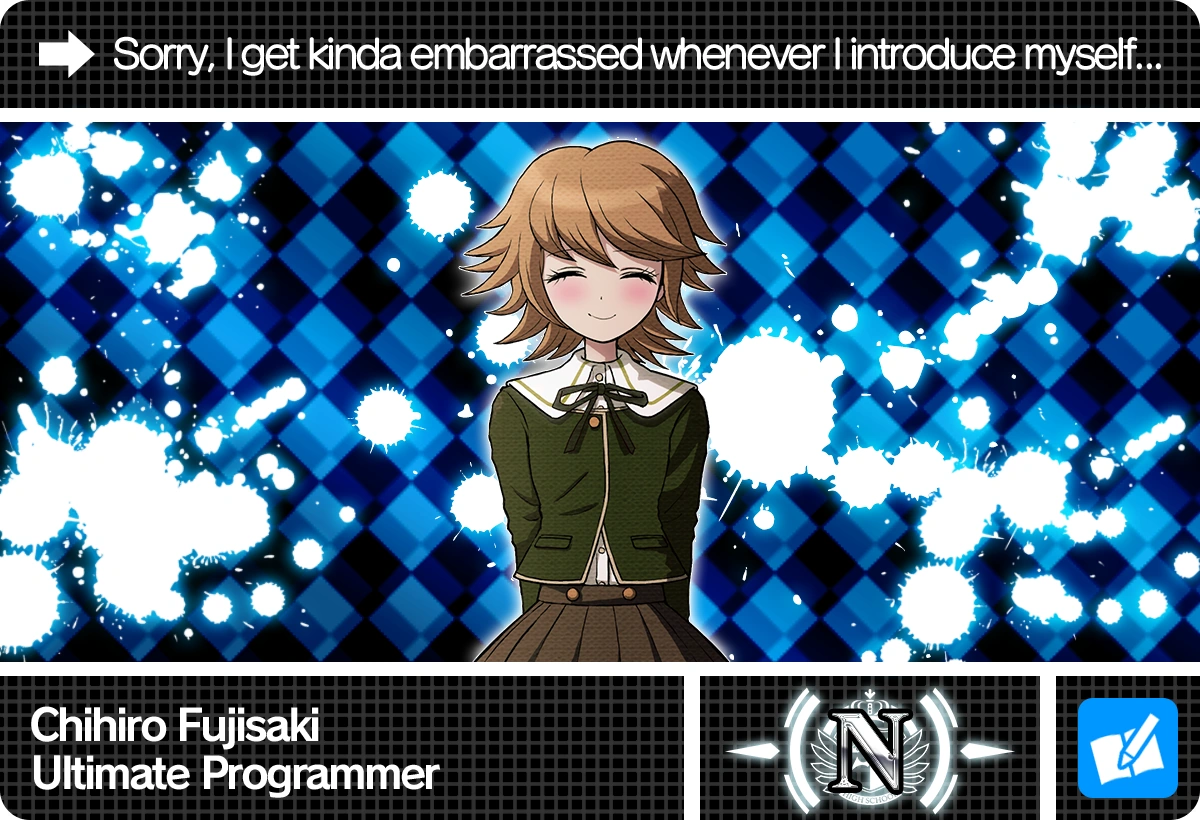
| Chihiro Fujisaki | 10 | 25 | 1 | 2 | 5 | 3 | 2 | 1 | |
| Genocide Jack | 20 | 10 | 5 | 3 | 1 | 2 | 2 | 2 | |
| Hifumi Yamada | 18 | 18 | 2 | 2 | 2 | 4 | 4 | 3 | |
| Junko Enoshima | 15 | 20 | 3 | 2 | 4 | 2 | 2 | 1 | |
| Junko Enoshima (Mukuro) | 18 | 15 | 4 | 2 | 1 | 1 | 5 | 3 | |
| Kiyotaka Ishimaru | 15 | 25 | 1 | 3 | 2 | 5 | 2 | 1 | |
| Kyoko Kirigiri | 15 | 20 | 1 | 2 | 4 | 2 | 4 | 3 | |
| Leon Kuwata | 18 | 15 | 4 | 2 | 1 | 1 | 5 | 3 | |
| Makoto Naegi | 18 | 18 | 1 | 2 | 3 | 3 | 4 | 7 | |
| Mondo Owada | 25 | 15 | 2 | 5 | 1 | 4 | 1 | 2 | |
| Monokuma | 20 | 10 | 5 | 3 | 1 | 2 | 2 | 2 | |
| Sakura Ogami | 20 | 10 | 5 | 3 | 1 | 2 | 2 | 2 | |
| Sayaka Maizono | 18 | 18 | 2 | 2 | 2 | 4 | 4 | 3 | |
| Toko Fukawa | 10 | 25 | 1 | 2 | 5 | 3 | 2 | 1 | |
| Yasuhiro Hagakure | 15 | 25 | 1 | 3 | 2 | 5 | 2 | 1 |
| Name | Influence | Focus | Strength | Defense | Intellect | Fortitude | Agility | Luck | |
|---|---|---|---|---|---|---|---|---|---|
| Aoi Asahina | 175 | 162 | 125 | 75 | 50 | 50 | 150 | 100 | |
| Byakuya Togami | 108 | 270 | 50 | 75 | 150 | 100 | 75 | 50 | |
| Celestia Ludenberg | 162 | 216 | 50 | 75 | 125 | 75 | 125 | 100 | |
| Chihiro Fujisaki | 122 | 270 | 50 | 55 | 150 | 100 | 75 | 50 | |
| Genocide Jack | 216 | 108 | 150 | 100 | 50 | 75 | 75 | 75 | |
| Hifumi Yamada | 175 | 175 | 75 | 75 | 75 | 125 | 125 | 100 | |
| Junko Enoshima | 162 | 216 | 100 | 75 | 125 | 75 | 75 | 50 | |
| Junko Enoshima (Mukuro) | 175 | 162 | 125 | 75 | 50 | 50 | 155 | 95 | |
| Kiyotaka Ishimaru | 162 | 270 | 50 | 100 | 75 | 150 | 75 | 50 | |
| Kyoko Kirigiri | 162 | 216 | 50 | 75 | 125 | 75 | 125 | 100 | |
| Leon Kuwata | 175 | 162 | 125 | 75 | 50 | 50 | 150 | 100 | |
| Makoto Naegi | 175 | 175 | 50 | 75 | 100 | 100 | 125 | 201 | |
| Mondo Owada | 270 | 162 | 75 | 150 | 50 | 125 | 50 | 75 | |
| Monokuma | 216 | 108 | 150 | 100 | 50 | 75 | 75 | 75 | |
| Sakura Ogami | 216 | 108 | 150 | 100 | 50 | 75 | 75 | 75 | |
| Sayaka Maizono | 175 | 175 | 75 | 75 | 75 | 125 | 125 | 100 | |
| Toko Fukawa | 108 | 270 | 50 | 75 | 150 | 100 | 75 | 50 | |
| Yasuhiro Hagakure | 162 | 270 | 50 | 100 | 75 | 150 | 75 | 50 |
Danganronpa 2: Goodbye Despair Characters[]
| Name | Influence | Focus | Strength | Defense | Intellect | Fortitude | Agility | Luck | |
|---|---|---|---|---|---|---|---|---|---|
| Akane Owari | 18 | 15 | 4 | 2 | 1 | 1 | 5 | 3 | |
| Byakuya Togami (Imposter) | 15 | 20 | 3 | 2 | 5 | 2 | 2 | 1 | |
| Chiaki Nanami | 10 | 25 | 1 | 2 | 5 | 3 | 2 | 1 | |
| Fuyuhiko Kuzuryu | 18 | 18 | 2 | 2 | 2 | 4 | 4 | 3 | |
| Gundham Tanaka | 18 | 18 | 2 | 2 | 2 | 4 | 4 | 3 | |
| Hajime Hinata | 25 | 15 | 2 | 5 | 1 | 4 | 1 | 2 | |
| Hiyoko Saionji | 15 | 25 | 1 | 3 | 2 | 5 | 2 | 1 | |
| Ibuki Mioda | 18 | 18 | 2 | 2 | 2 | 4 | 4 | 3 | |
| Izuru Kamukura | 20 | 10 | 5 | 3 | 1 | 2 | 2 | 2 | |
| Kazuichi Soda | 15 | 20 | 3 | 2 | 4 | 2 | 2 | 1 | |
| Mahiru Koizumi | 15 | 20 | 1 | 2 | 4 | 2 | 4 | 3 | |
| Mikan Tsumiki | 15 | 25 | 1 | 3 | 2 | 5 | 2 | 1 | |
| Monomi | 15 | 25 | 1 | 3 | 2 | 5 | 2 | 1 | |
| Nagito Komaeda | 18 | 18 | 1 | 2 | 3 | 3 | 4 | 7 | |
| Nekomaru Nidai | 25 | 15 | 2 | 5 | 1 | 4 | 1 | 2 | |
| Peko Pekoyama | 20 | 10 | 5 | 3 | 1 | 2 | 2 | 2 | |
| Teruteru Hanamura | 18 | 18 | 2 | 2 | 2 | 4 | 4 | 3 | |
| Sonia Nevermind | 10 | 25 | 1 | 2 | 5 | 3 | 2 | 1 | |
| Usami | 15 | 20 | 3 | 2 | 4 | 2 | 2 | 1 |
| Name | Influence | Focus | Strength | Defense | Intellect | Fortitude | Agility | Luck | |
|---|---|---|---|---|---|---|---|---|---|
| Akane Owari | 175 | 162 | 125 | 75 | 50 | 50 | 150 | 100 | |
| Byakuya Togami (Imposter) | 162 | 216 | 100 | 75 | 150 | 75 | 75 | 50 | |
| Chiaki Nanami | 108 | 270 | 50 | 75 | 150 | 100 | 75 | 50 | |
| Fuyuhiko Kuzuryu | 175 | 175 | 75 | 75 | 75 | 125 | 125 | 100 | |
| Gundham Tanaka | 175 | 175 | 75 | 75 | 75 | 125 | 125 | 100 | |
| Hajime Hinata | 270 | 162 | 75 | 150 | 50 | 125 | 50 | 75 | |
| Hiyoko Saionji | 162 | 270 | 50 | 100 | 75 | 150 | 75 | 50 | |
| Ibuki Mioda | 175 | 175 | 75 | 75 | 75 | 125 | 125 | 100 | |
| Izuru Kamukura | 216 | 108 | 150 | 100 | 50 | 75 | 75 | 75 | |
| Kazuichi Soda | 162 | 216 | 100 | 75 | 125 | 75 | 75 | 50 | |
| Mahiru Koizumi | 162 | 216 | 50 | 75 | 125 | 75 | 125 | 100 | |
| Mikan Tsumiki | 162 | 270 | 50 | 100 | 75 | 150 | 75 | 50 | |
| Monomi | 162 | 270 | 50 | 100 | 75 | 150 | 75 | 50 | |
| Nagito Komaeda | 175 | 175 | 50 | 75 | 100 | 100 | 125 | 201 | |
| Nekomaru Nidai | 270 | 162 | 75 | 150 | 50 | 125 | 50 | 75 | |
| Peko Pekoyama | 216 | 108 | 150 | 100 | 50 | 75 | 75 | 75 | |
| Teruteru Hanamura | 175 | 175 | 75 | 75 | 75 | 125 | 125 | 100 | |
| Sonia Nevermind | 108 | 270 | 50 | 75 | 150 | 100 | 75 | 50 | |
| Usami | 162 | 216 | 100 | 75 | 125 | 75 | 75 | 50 |
Danganronpa V3: Killing Harmony Characters[]
| Name | Influence | Focus | Strength | Defense | Intellect | Fortitude | Agility | Luck | |
|---|---|---|---|---|---|---|---|---|---|
| Angie Yonaga | 15 | 25 | 1 | 3 | 2 | 5 | 2 | 1 | |
| Gonta Gokuhara | 25 | 15 | 2 | 5 | 1 | 4 | 1 | 2 | |
| Himiko Yumeno | 15 | 25 | 1 | 3 | 2 | 5 | 2 | 1 | |
| Kaede Akamatsu | 18 | 18 | 2 | 2 | 2 | 4 | 4 | 3 | |
| Kaito Momota | 25 | 15 | 2 | 5 | 1 | 4 | 1 | 2 | |
| K1-B0 | 18 | 18 | 2 | 2 | 2 | 4 | 4 | 3 | |
| Kirumi Tojo | 15 | 20 | 3 | 2 | 4 | 2 | 2 | 1 | |
| Kokichi Oma | 15 | 20 | 3 | 2 | 4 | 2 | 2 | 1 | |
| Korekiyo Shinguji | 15 | 20 | 1 | 2 | 4 | 2 | 4 | 3 | |
| Maki Harukawa | 20 | 10 | 5 | 3 | 1 | 2 | 2 | 2 | |
| Miu Iruma | 10 | 25 | 1 | 2 | 5 | 3 | 2 | 1 | |
| Rantaro Amami | 18 | 18 | 1 | 2 | 3 | 3 | 4 | 7 | |
| Ryoma Hoshi | 18 | 15 | 4 | 2 | 1 | 1 | 5 | 3 | |
| Shuichi Saihara | 10 | 25 | 1 | 2 | 5 | 3 | 2 | 1 | |
| Tenko Chabashira | 18 | 15 | 4 | 2 | 1 | 1 | 5 | 3 | |
| Tsumugi Shirogane | 15 | 20 | 1 | 2 | 4 | 2 | 4 | 3 |
| Name | Influence | Focus | Strength | Defense | Intellect | Fortitude | Agility | Luck | |
|---|---|---|---|---|---|---|---|---|---|
| Angie Yonaga | 162 | 270 | 50 | 100 | 75 | 150 | 75 | 50 | |
| Gonta Gokuhara | 270 | 162 | 75 | 150 | 50 | 125 | 50 | 75 | |
| Himiko Yumeno | 162 | 270 | 50 | 100 | 75 | 150 | 75 | 50 | |
| Kaede Akamatsu | 175 | 175 | 75 | 75 | 75 | 125 | 125 | 100 | |
| Kaito Momota | 270 | 157 | 75 | 150 | 50 | 125 | 45 | 70 | |
| K1-B0 | 175 | 165 | 75 | 75 | 75 | 125 | 125 | 100 | |
| Kirumi Tojo | 162 | 216 | 100 | 75 | 125 | 115 | 115 | 50 | |
| Kokichi Oma | 162 | 216 | 100 | 75 | 125 | 75 | 75 | 50 | |
| Korekiyo Shinguji | 162 | 216 | 50 | 75 | 125 | 75 | 125 | 100 | |
| Maki Harukawa | 216 | 108 | 150 | 100 | 50 | 75 | 75 | 75 | |
| Miu Iruma | 122 | 270 | 50 | 55 | 150 | 100 | 75 | 50 | |
| Rantaro Amami | 175 | 175 | 50 | 75 | 100 | 100 | 125 | 201 | |
| Ryoma Hoshi | 175 | 162 | 125 | 75 | 50 | 50 | 150 | 100 | |
| Shuichi Saihara | 108 | 270 | 50 | 75 | 150 | 100 | 75 | 50 | |
| Tenko Chabashira | 175 | 162 | 125 | 75 | 50 | 50 | 155 | 95 | |
| Tsumugi Shirogane | 162 | 215 | 50 | 75 | 125 | 75 | 125 | 100 |
Trivia[]
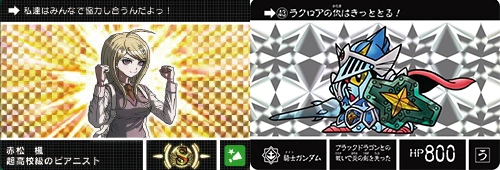
- The Ultimate Death Card Machine (カードデス Kādodesu) and its cards are a parody of Bandai's Carddass (カードダス Kādodasu) collectable cards, particularly the designs of the original 1988 Gundam set.

- Mukuro Ikusaba appears as herself in her "Ultimate Soldier" outfit in the illustration on her U ranked card, instead of disguised as Junko Enoshima. The U ranked version of her card unlocks a Danganronpa V3 exclusive non-disguised Mukuro pixel for use in Monokuma's Test. This sprite previously only appeared in the Danganronpa 1.2 Reload artbook.
- Similarly, Junko Enoshima's cards unlock a Junko pixel which also previously only featured in the Danganronpa 1.2 Reload artbook, featuring her white and black bear hairties, red bow tie, and black and white tie to distinguish her from Mukuro's disguise sprite.

- Izuru Kamukura's cards and in-game sprites are also new to Danganronpa, featuring a recolored version of the singular Izuru sprite featured in Danganronpa 2: Goodbye Despair. His hair is noticeably lighter, he has pale skin rather than grey, and four different facial expressions instead of just one.

- Each card features the student's name, image, and talent on the front of the card:
- While Kyoko Kirigiri's talent is listed on her cards as the Ultimate Detective, Hajime Hinata is listed as Ultimate ??? on all three of his cards rather than Reserve Course Student, despite both Hajime and Kyoko being former Ultimate ???.
- Makoto Naegi is listed as his title Ultimate Lucky Student, rather than his secondary talent, Ultimate Hope, which instead is listed on Izuru Kamukura's card.
- The Ultimate Imposter's talent is listed as their real talent, Ultimate Imposter, instead of Byakuya Togami's talent Ultimate Affluent Progeny, even though they are named on their card as "Byakuya Togami (Imposter)" and dressed as Byakuya in both their cards and their pixel art.
- Junko Enoshima's talent is listed as Ultimate Despair on all three of her cards, rather than Ultimate Fashionista or a translation of her "true", inherent talent of Super High School Level Analytical Prowess.
- Mukuro Ikusaba is listed under her sister's talent Ultimate Fashionista while wearing her Junko disguise in her N and S ranked cards, but her listed talent changes to Ultimate Soldier on her U ranked card, although the name on the card is still "Junko Enoshima (Mukuro)"
- Monomi is listed as "Monokuma's Sister", whereas Usami is listed as "Teacher at Hope's Peak Academy".
- Rantaro Amami's talent is listed as Ultimate ??? on his N and S rank cards, but his listed talent changes to Ultimate Survivor on his U rank card. His former talent of Ultimate Adventurer does not appear on any cards.
- Maki Harukawa's talent is listed as Ultimate Child Caregiver on her N and S rank cards, but her listed talent changes to her true talent Ultimate Assassin on her U rank card.
- K1-B0's secondary talent as Ultimate Hope Robot isn't mentioned on any of the cards, as all of them list him as Ultimate Robot.
[]
| Multiple Games | Class Trials • Truth Bullets • Monocoins • MonoMono Machine • Free Time Events • Hidden Monokumas |
| Danganronpa 1 | Class Trials • Truth Bullets • MonoMono Machine • Free Time Events • School Mode |
| Danganronpa 2 | Class Trials • Truth Bullets • MonoMono Yachine • Hidden Monokumas • Free Time Events • Island Mode • Pets • Magical Girl Miracle ★ Monomi |
| Danganronpa Another Episode |
Megaphone Hacking Gun • Monoku-Man • Books • Notes • Reference Books • Hidden Kids • Socki the Sock • Hit List |
| Danganronpa V3 | Class Trials (V3 / Demo) • Truth Bullets • MonoMono Machine • Hidden Monokumas • Free Time Events • Death Road of Despair • Hotel Kumasutra • Love Across the Universe • Ultimate Talent Development Plan • Ultimate Death Card Machine • Despair Dungeon: Monokuma's Test |
| Danganronpa S | Battle Mode • Development Mode |